Exactly three months ago, I had written a long ass blog post, which I never got to post, about the For Tax Reasons animation process. How we went from paper to digital with out the aid of Cintiq's. But then we ended up buying Cintiqs, and our process was turned on it's heads.
Anyways, so I'm going to post about our old method, because this is the internet- and the internet is for sharing information, and maybe this can help somebody out who wants to work on paper but still produce a sharp and clean animation.
So, with out further ado, the man with a million voices- "How We Animate" Part II. The process of taking animation on paper and putting it into a computer.
HOW WE ANIMATE(D): PART II: THE SOFTWARE & THE METHOD
Teh Warez
These are the programs you'll need.
Adobe Photoshop, for scanning, cleaning and coloring
Adobe Bridge/Adobe Illustrator, for cleaning (you're going to need at least version CS2 so you can use the Livetrace tool)
Adobe After Effects, for sequencing and compositing everything together
Final Cut Pro, for editing together each shot
So this software is kind of expensive, but I found this one website which has some really good discounts on it. So go and check that out if interested in trying out this method.
Step 1: Scanning
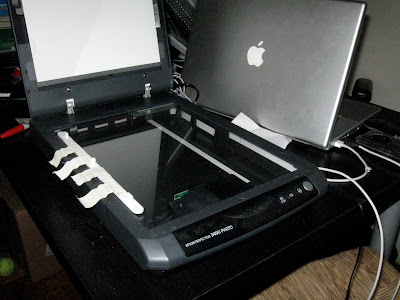 So first things first, Windex your scanner real good and tape a peg bar to it. This is how you're going to keep all of your drawings registered to one another. Remember, you're going to have to keep that peg bar taped in the same place, and use the same scanning marquee until you finish scanning a shot. So if you need to use your peg bar for something else, like stirring some lentil soup your making- go do that first, and then tape down your peg bar.
Do a preview scan and select the area which encompasses the entire shot and maybe a little more. It sucks to scan 80 drawings and then realize the last one is outside of your scaning area. Settings-wise. I suggest scanning everything at at least 300 DPI. It helps keep the detail for the Livetracing step later on, and if you ever decide to zoom in with a camera move things won't look shitty. If there are any level adjustments you can do no the scanner to improve your image go ahead and set them now, but most of your adjusting will be done post scanning.
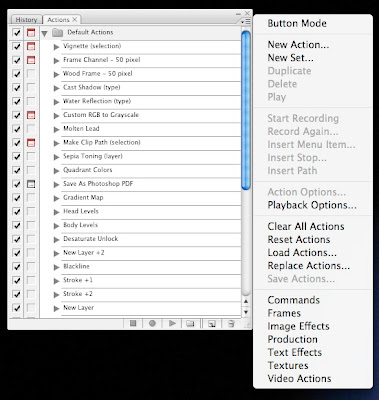
So this is a good chance to introduce ACTIONS. Actions in Photoshop are going to be a huge help through this entire process. Open your Actions window, and click on the little menu thingy on the upper right hand corner to make a new action. Name your action, and then run through these scanning steps. Photoshop will record your each menu item you choose and everything, and later on, when you "play" the action, it will do everything automatically. Actions are big help for the whole process. So here's the scanning action:
a. File > Import > (Your Scanner Name) TWAIN
You'll be routed into your scanners own interface, hit Scan. After it imports the image you'll be back in Photoshop.
b. Image > Rotate Canvas > 90º Clockwise or Counter Clockwise depending what side of the scanner you're using.
c. Double click on the Layer to change it from a locked Background to Layer 0.
d. Then hit ⌘ Shift U to Desaturate the layer- or- Image > Adjustments > Hue/Saturation.
I do this because I don't need any of the color information, and it just takes up more memory.
e. Save your file. Now, to make a Save command appear in an action, you should go to your Actions menu, and select Insert Menu Item. Then choose File > Save.
For you newbies: Save it as a Photoshop file, not a JPEG, which would compress it and not allow for layers.
Now stop recording by hitting that little square stop button, and you've got your Scan action.
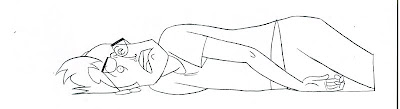
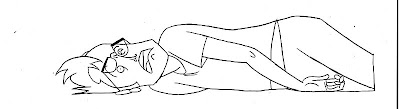
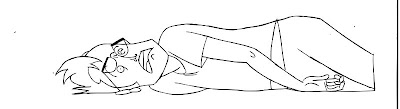
Here's what one of our scans looks like:
Step 2: Leveling(sp?)
So, you've got all your drawings scanned. Preferably in folder labeled Scans, in a sub folder labeled by shot number. I like to keep my raw scans around, just in case I screw something up. Now it's time to make those Scans look a little sharper by leveling them. Duplicate the Scans folder, and rename the copied folder "Clean".
It's time to use the Level tool in Photoshop. ( ⌘ L - or - Image > Adjustments > Levels)
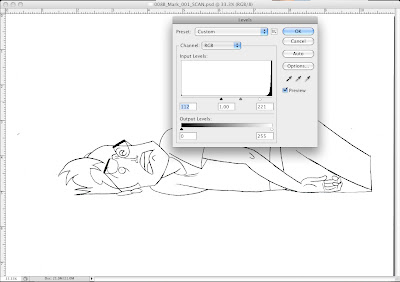 Drag the Black and White input arrows back and forth, and try to get the white of the paper to be white and the line to be as black as possible with out crunching the image like this:
 Click on the image for the full effect.
When you think you've got a decent level which will work for the drawings- make a Level Action with those settings.
Now you can go to File > Automate > Batch and you can Batch level a whole folder of Photoshop files using the Action you just made.
Step 3: Cleaning
This is where things get a little crazy. We're gonna use Bridge and Illustrator to vectorize the lines of your drawing. This is to get rid of the gray half pixels and make your lines more defined and solid black. This will really come in handy when you're at the coloring stage. When you're lines are sharp and solid black, you don't have to waste time zooming in and coloring over white specks by hand. I made a confusing post about this before, but I'll explain it again here.
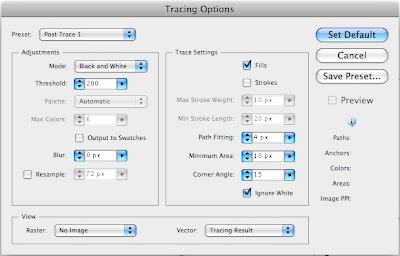
Open up one of your leveled Photoshop files in Illustrator. Select the layer with the image on it, go to Object > Live Trace > Tracing Options.
Click the "Preview" button so that you can watch how Illustrator traces your image as you change the settings. These are two of the settings I use.
This for a more rounded approximation, but smoother line.
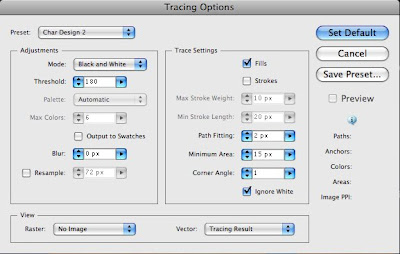
 And this for a closer match to your pencil line, but rougher.
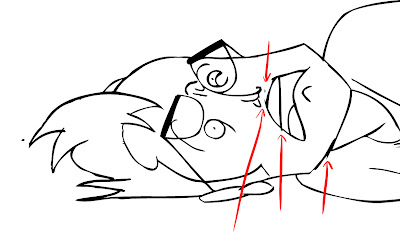
You might have to tweak these settings to fit how you're drawings look. It's not perfect, but it really helps the quality of your final image, at the sacrifice of some details. Like these little Flash looking lines the computer makes.
 Once you've figured out a setting which works with your scans. Open up Bridge. Select your Clean folder. Go to Tools > Illustrator > Livetrace
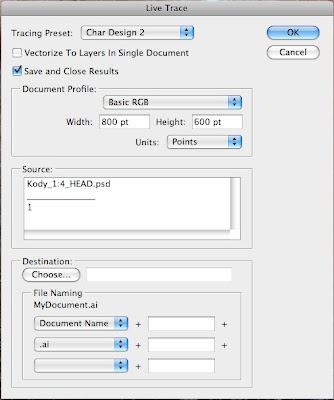 Select your Preset, Basic RGB and Choose your Destination.
And BOOM Bridge will Livetrace the whole folder for you. See, not that hard.
Step 4: Almost Coloring
Now you've got a Clean folder full of AI (Illustrator) and PSD (Photoshop) files. Copy those AI files into a new folder called "COLOR". You're going to bring these Illustrator files BACK into Photoshop to color them.
Open up Photoshop and import the .ai files. Make sure you're importing at atleast 300 DPI, and using the Media Box, not the Bounding Box as your selection area. I dunno, Illustrator is weird with it's boxes. Sometimes you also have to rotate your page set ups in Illustrator too if things are like coming in tall ways and they should be wide ways. You'll figure it out.
Save, these new PSD's. These are what you're going to color and stuff. But coloring of course is another post, because this one is all ready way too long.
THE END FOR NOW
So, that was our process for getting a scanned drawing to have a clean sharp line for easy and quasi-professional looking color. This was our work around for both: not having the skillset for drawing directly into the computer using Wacom tablets, and not having the advantage of the more expensive Cintiq, where you can draw directly onto the screen. In some upcoming posts I'll talk about how we color, and how it's been working on Cintiqs. Until then, I'm gonna shut the fuck up cuz this is way too much writing.
 Whew, we just got back from day one of Otakon (day two if you count standing in the pre reg line Thursday night) and it was awesome!
 Our panel "Let's Talk Animation! with For Tax Reasons" went off without a hitch, and surprisingly there were more than 10 people in attendance. In fact, the whole room was filled with fans. And they actually wanted to watch each episode of Ronin Dojo Community College DX: The Digital Pirates of Dark Water Saga. We were just thinking we'd premiere the last episode as we'd promised, but they asked for it.


